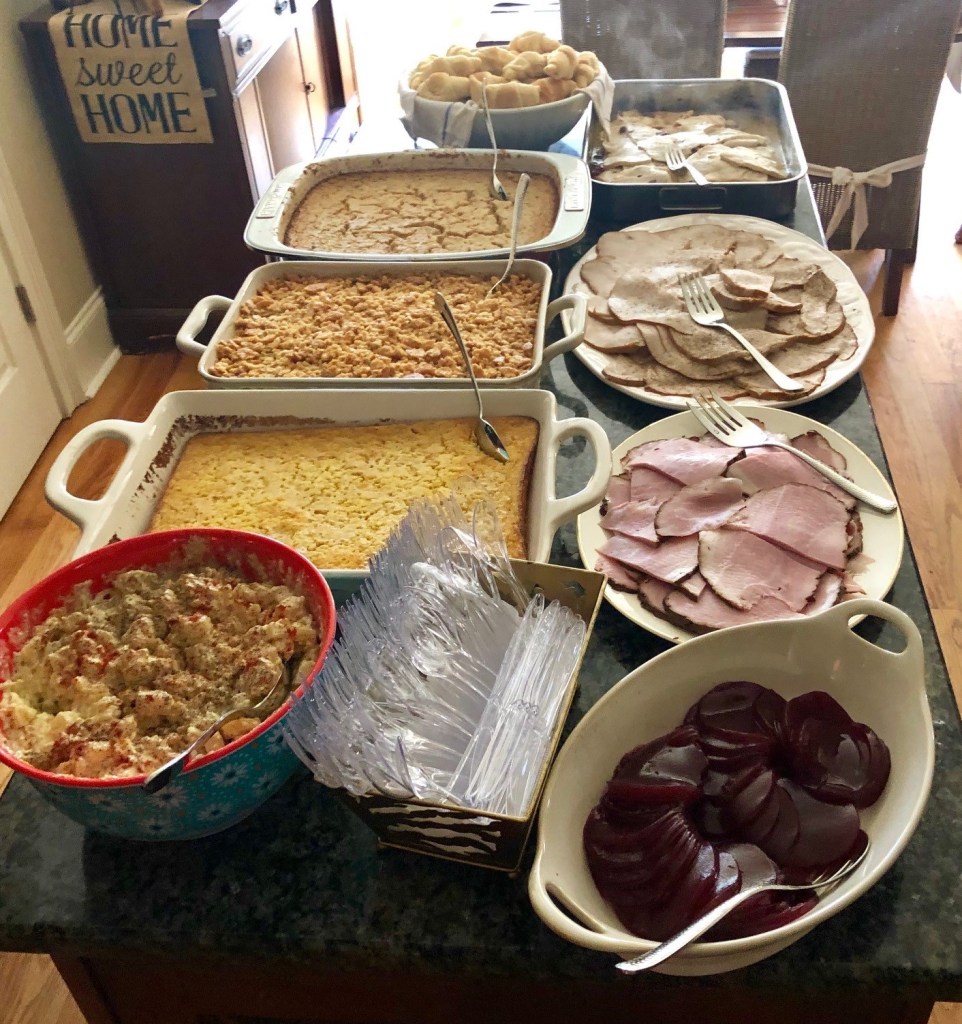
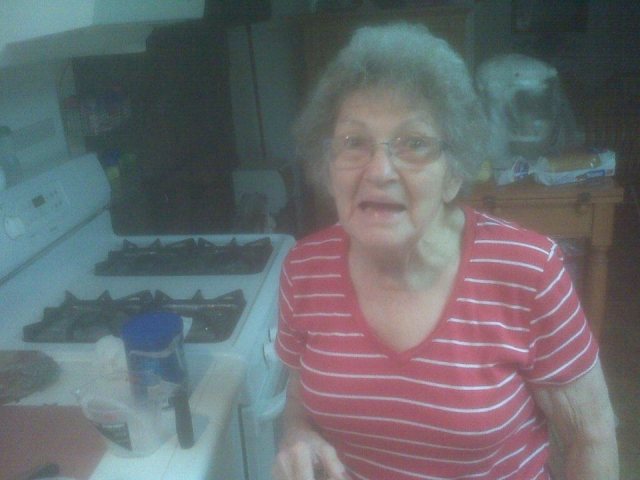
No matter the time of day…or night, if you came to the Briggs house and you were greeted by my Mom, very shortly you were asked, “Can I get you something to eat?” Today, if…you hear that question at all, more often than not, it’s probably said in hopes you’ll respond with southern humility, and politely decline…or with an unstated understanding of what that really means when you say yes…a reply that usually involves an offer of something in a box or bag from the pantry or…”let’s go out!!”
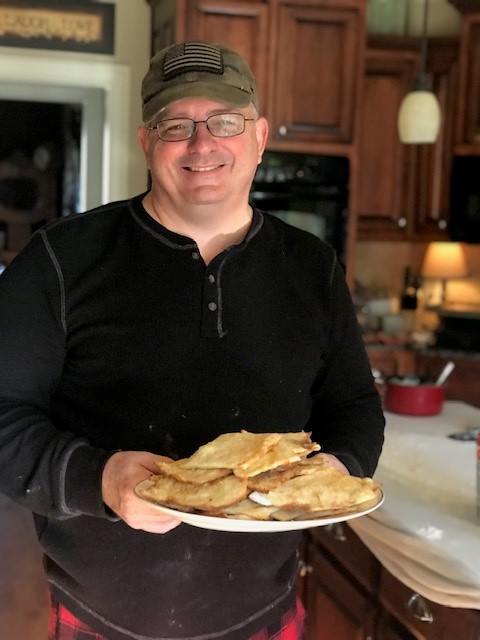
But not my Mom! She was Mom to me…Louise to friends, Mrs. Briggs to sales people calling on the phone…she enjoyed that…and for a very special and select few…Mam-maw. But to everyone who entered her home, especially those who knew about…and maybe counted on her guaranteed offer to feed them, she was the consummate host and server of people. And whether from her freezer, the refrigerator, her counter top or best of all, her imagination and love for not only cooking…but cooking for those she loved, you always got her on a plate! And from that, I learned that one of the best kept secrets of Mom’s cooking was…she never cooked alone. This is my motivation for my new food blog, The Briggs House…so those of you who love to cook great food, will never cook alone!! Please subscribe below, and join me on a journey of discovery and love for food and what it brings to life, to love and to those who will love your food too!!
Not everyone likes to cook. For many, they’ve just never had anyone to show them how. Others have tried and been met with little or no success in their own estimation (maybe others too, sorry!!) and have given up…left it to others, or just go out to eat if they want more than a microwave can produce!!
But we may be seeing a rebirth of home cooking…and not too far removed from days of old when families gathered each night, or especially on Sunday after church…and ate home cooked meals all together.
Life has a funny way of coming around full circle. Not too long ago I saw a kid wearing multi-colored striped bell bottom pants…yes, bold, multi-colored striped pants!! Bell bottoms no less!!! Who could ever imagine anyone wearing such a thing?!?!
Well, I used to wear them! You may have too! In fact, I remember begging my Mom to find them and buy them for me! Had to have them…and was so proud when I got them and wore them to school for the first time!!
And here we are…full circle…with pants and hair styles and so many other trends and even music…coming around again!
So often, cultural challenges, war, economic depressions and other sudden and tragic events drive us as a country into activities, relationships and associations, as well as rituals that may have fallen by the wayside, for in some cases, many years or altogether.
Back in 2001, the tragic events of 9/11 drove church attendance to record highs. The wars and conflicts that followed drew many, at least for a moment, into unity and collective support of the military, first responders and others. As a nation, we drew closer together and our faith, our neighborliness…and time around the table with family was once again restored!
In 2020, we once again faced a national crisis that drove these same sentiments and traditions into hyperdrive, with one difference…we had no choice but to stay and eat at home…enter Covid-19!!
The Covid-19 pandemic, tragic in so many ways, also gave rise to renewed interest and the satisfaction and joy associated with feeding those you love and care about!!
So, here’s my message today…good food can in fact be simple…simple goodness!! Dishes don’t have to be complicated, or necessarily expensive to be good!!
For me, eating good food goes like this:
You eat with your eyes first…
Then your nose…how it smells.
And then with taste!!
And when I cook, it’s pretty much the same!
Ingredients need to look good…they need to look like something I or others will want to eat! That isn’t meant to belittle anyone who likes Pig’s Feet…I am sure they can be great (??) but they wouldn’t generally pass my “LOOK TEST” and make it to my menu!
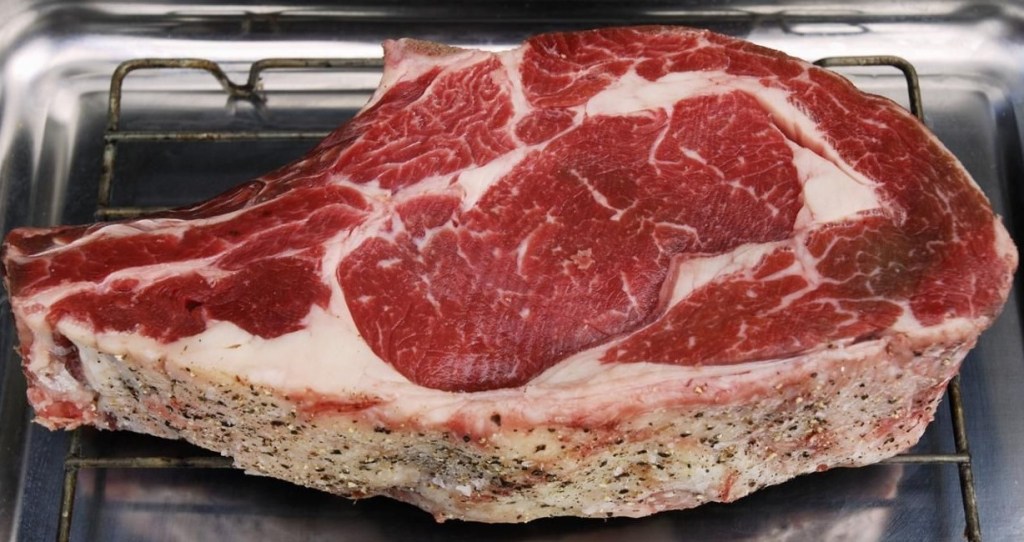
Beautifully marbled Ribeye….
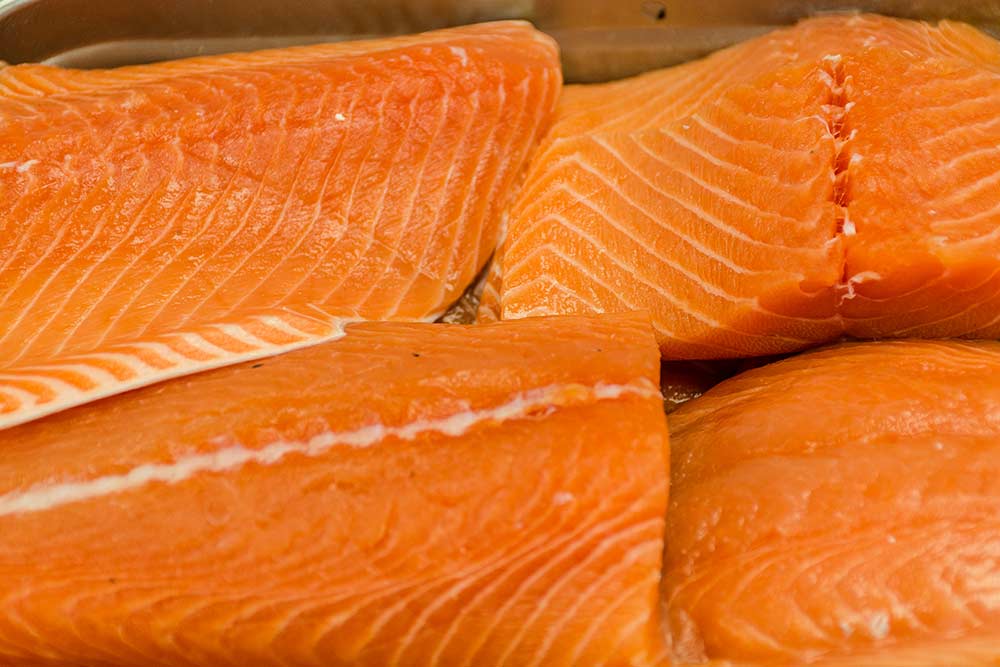
But a marbled Ribeye…or fresh filet of Salmon with its deep orange color and tender texture…fresh Pasta or steaming hot buttermilk biscuits dripping with butter…all those things and many more just look like something you…almost anyone…wants to eat!!
And just for the record…one of the best beef dishes I ever tasted was…Beef Tongue!! Yep, it was!! And I plan to cook it one day! I just won’t be able to tell Sheila in advance…although when I ate it, it was better than the most tender and rich tasting roast beef I’ve ever had…and she loves roast beef!!!
And then there’s smell!! Now for me, smell is almost, if not more important, than either my eyes or taste! This may seem strange to some, but I can often tell if food needs salt, or if certain spices will compliment food or not while I am cooking…just from the smell! And, of course smell is an incredible safeguard as well. Fresh and safe food should have associated aromas just as those foods that are spoiled and unsafe, typically will have aromas that serve to warn us against using them. Now there are exceptions…I think our kids have eaten things over the years while off at college or living on their own that probably would have killed half of a small city, your kids too probably…so again, there are exceptions!! But I probably can’t tell you the number of times Sheila and I have walked into a restaurant to eat, and turned right back around and left. Why? Something didn’t smell right! Whether it was the floors or furnishings or old grease and oils…or smelling that smell of dirty mop water…all of it meant someone didn’t care or no longer paid attention to the little things like smells that can tell you so much about what and where you eat…to keep you safe…or successful as you prepare food for others.
And the biggie: Taste! For those that prepare food for other people, you have the first shot at tasting food…and taste you should, sorry…taste you must!! Watch any cooking show on TV, especially the competition shows and every time, professional Chefs harp on tasting food as you cook.
My Dad – Cook in U.S. Army during Korean Conflict
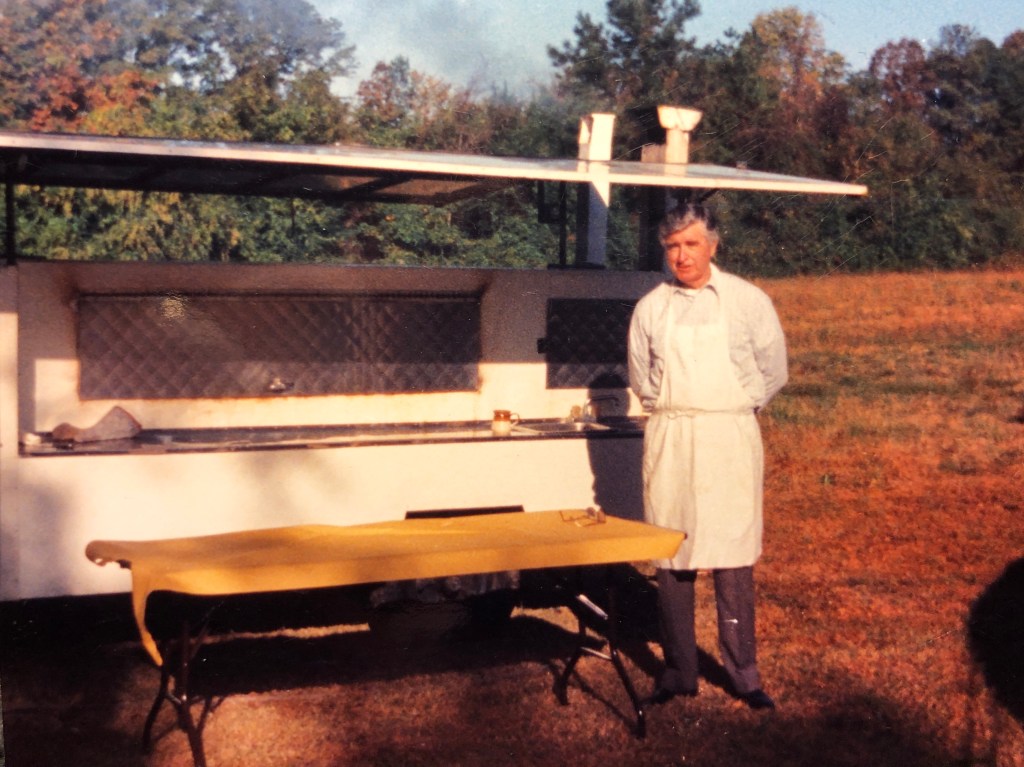
As I mentioned earlier, my Dad was a cook in the U.S. Army. After he was discharged, he was the Chief Dietician for Kilby State prison in Alabama for 6 years. He oversaw the preparation and serving of 3 meals daily to over 600 prison inmates.
Dad & his very early version of a Food Trailer. It had a steam line and warming cabinet on one side and a cooking area heated by a wood burning fore box on the end that could cook 40-50 Boston Butts at once.
And from that, and his other experience over the years from instituting Wednesday night suppers for much of his church congregation every week, and the feeding of 100’s of teenagers at Bible camps held each summer in Florida, or furnishing Bar-B-Q from his Food Trailer for events and friends, he always said, “If the Cook goes hungry, it’s his own fault!” It was his way of really saying…if you’re going to cook, you have to taste your food!
So, if you can see….although I have cooked a meal or two years ago with both eyes bandaged over, maybe that’s a story for another day…or you have someone who can see for you; and you can smell, or have someone who can smell for you…and you can taste, or have someone that can taste for you, and that may be necessary if you find yourself needing to prepare foods you have sensitivities or allergies to, or possibly another preference such as being a vegetarian and serving meat at a dinner party or other dietary restrictions and medical conditions…the GREAT news is, you can become a cook!!!
One of the simplest and easiest meals that qualifies fully for the title, Simple Goodness, has to be the fresh Salmon filet!
Now you can buy frozen Salmon filets that are already cut into portion sizes, or even seasoned and flash frozen. But there’s really no comparison to serving that fresh portion cut from a larger and unfrozen Salmon filet!
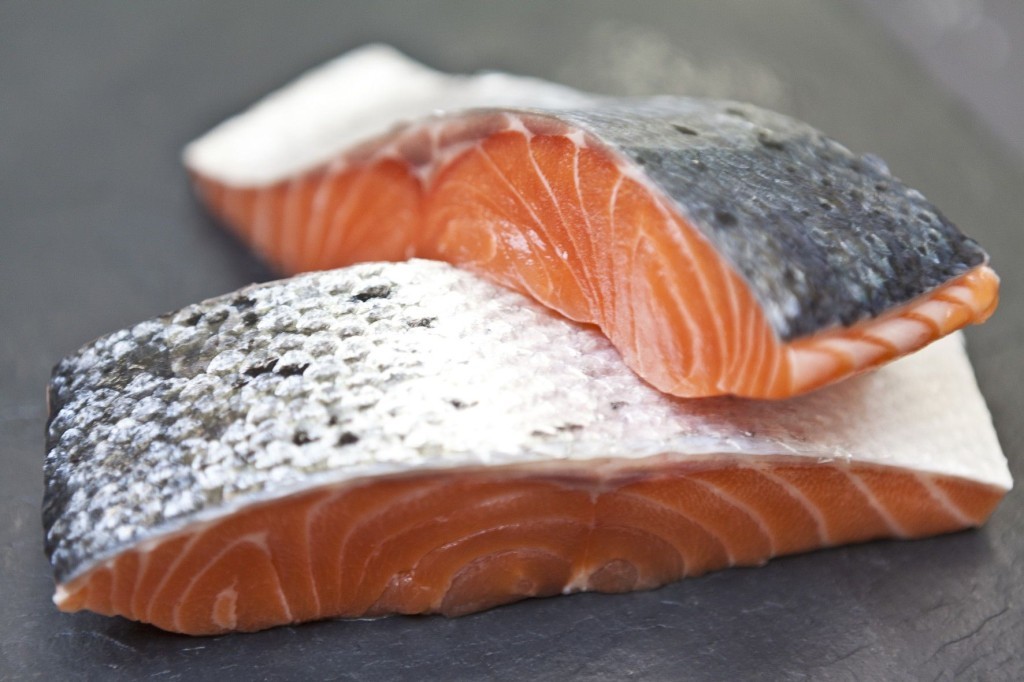
Freshly portioned servings of Salmon Filet.
When choosing Salmon for your meal, you may find variations in what you can buy at your local store. There are two main sources to choose from for Salmon and those are Farm Raised or Wild Caught. But there are many species of Salmon, although it’s likely you’ll often have either Atlantic or Sockeye to choose form outside of Farm Raised. Below is some specific and hopefully helpful information about the wide ranging species of Salmon:
King Salmon –
Market Names: Chinook salmon, King salmon, Spring salmon, Tyee salmon, Blackmouth salmon Primary Primary Source: Alaska, Oregon, California Season: California, Oregon & Washington troll: April—Sept. Alaska: May—August, winter troll: October—April Flavor Profile: King salmon have the highest oil content of all five species of wild salmon and are the largest of the Salmon family.
Sockeye –
Market Names: Sockeye, Red Salmon, Blueback Salmon Primary Source: Alaska, B.C., Washington Season: May – August Flavor Profile: High oil content and a stunning bright-red flesh color
Coho –
Market Names: Silver salmon. Silver bullets , Coho Primary Source: Alaska, B.C., Washington Season: July-October Flavor Profile: Coho salmon have a bright red color flesh and is right in the middle on the salmon scale of oil content
Pink –
Market Names: Pink Salmon, Humpies Primary Source: Alaska, B.C., Washington Season: July-September Flavor Profile: Pinks have the lowest oil content of the five Pacific salmon species, and a more delicate, trout-like flavor
Chum –
Market Names: Chum salmon, Fall salmon, Keta salmon, Dog Salmon, Silverbright Primary Source: Alaska, B.C., Washington Season: May – November Flavor Profile: Of the five salmon species, chum is a comparatively paler-fleshed fish, with a lower oil content
Steelhead –
Market Names: Rainbow trout, golden trout Primary Source: Idaho and Washington Season: Year-round Flavor Profile: Trout has a delicate flavor that benefits from milder ingredients
Atlantic Salmon –
Market Names: Atlantic salmon is usually identified by country of origin e.g., Norwegian salmon, Chilean salmon, Scottish salmon Primary Source: Chile, Canada, Norway, Washington state and Maine Season: Year-round Flavor Profile: Relatively high in oil content, Atlantic salmon is very adaptable to a variety of cooking methods
Skin on Salmon filet portions.
Another option you’ll want to consider is skin on or skin off. For me, I prefer skin on selections. While you don’t typically eat the skin after cooking, the skin on option adds a significant boost to flavor and ease of both cooking and eating without causing the fish to become dry, especially if cooked a little longer than needed or intended.
Typically, wild caught Salmon will be slightly more expensive per pound and farm raised. And prices for different species can vary significantly.
So which is better…wild caught or farm raised?? This is likely one of those things that follow not only personal preference and cost…but emotions can run deep about which is better! Food can do that for some…almost akin to Georgia vs. Georgia Tech, Alabama vs. Auburn, Ford vs. Chevy or Dodge!! And likewise, some don’t consider anything farm raised as an option when wild caught is the next case at the grocery store!
For me, wild caught is better. And truly, the price is usually not that much more. But I also have no problem using farm raised if the selection of wild caught is lacking or happens to be significantly more expensive.
As far as actually selecting your filet, give the filet a poke! Press the salmon fillet with your index finger. The flesh should spring back and not leave an indention from your fingerprint in it.
The flesh should have a bright orange, almost red hue, with nice marbling and there shouldn’t be an overly fishy smell…like you might smell if you walk down to the shore at low tide! Remember, if it smells good…it should eat good!!
From a large filet of Salmon, slice portions crossways. Salmon filets are thick along one long side and much thinner along the opposite long side. using a very sharp knife, I usually slice portions 2 – 3 inches wide at the end of the filet with the thickest meat. As I move toward the thinner end of the filet, I typically slice the last portion or so 3 – 4 inches wide so the same portion weight as near as possible is available for each person. This will also help to balance out needed cook time for each portion despite their sleight differences in thickness.
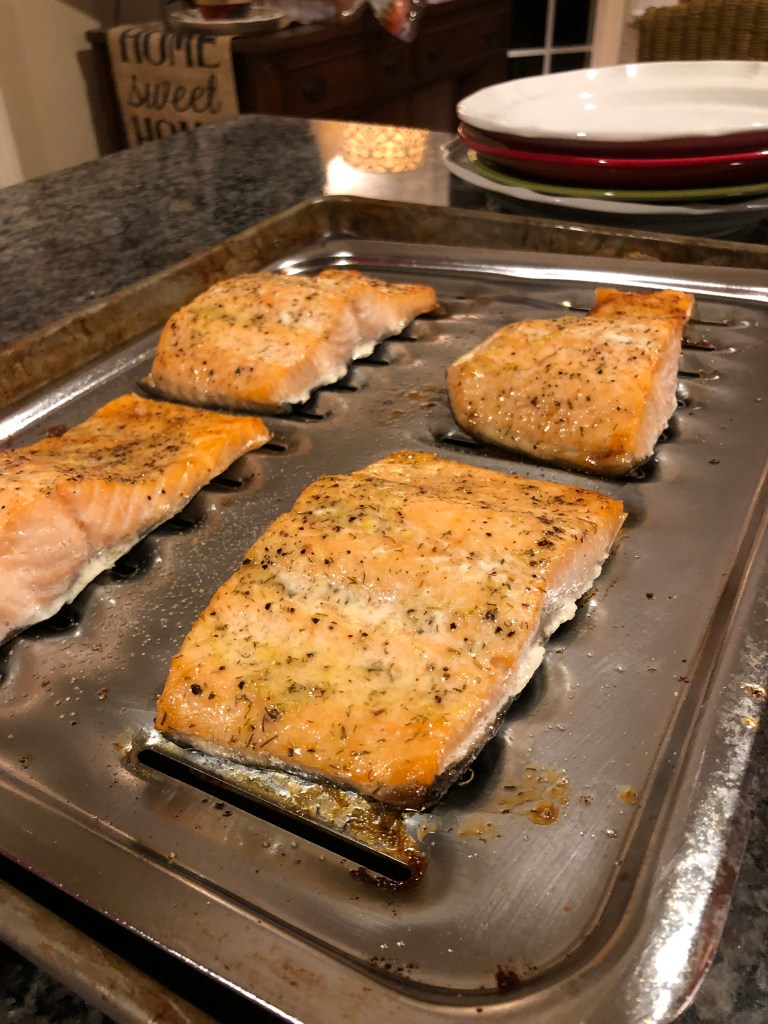
Roasted Salmon Filets notice the white Albumen seeps from the fish when the filet is done, but remains moist, tender and flaky.
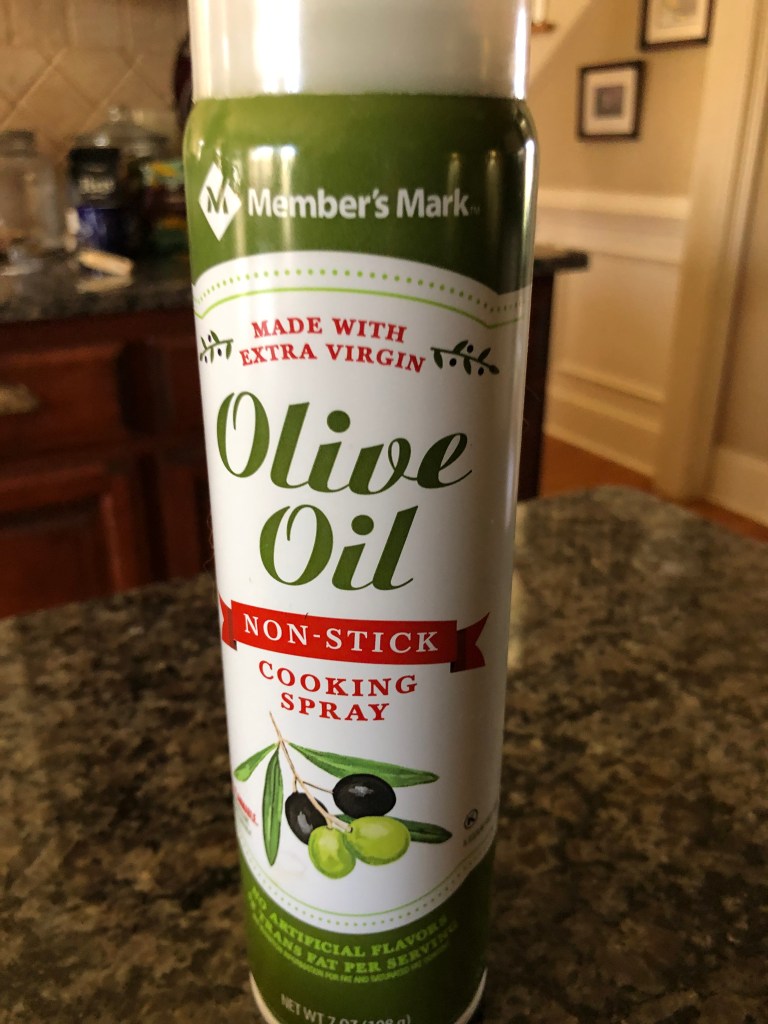
When I roast Salmon, I usually use an oven broiler pan. It’s a good idea to remove the slotted cover and spray the inside of the deeper pan with a cooking spray, as well as the slotted cover. This will help to both avoid sticking and ease clean up. You can also choose to line the deeper, bottom pan with aluminum foil that will catch the drippings and ease cleanup even more!!!
Cooking spray applied to the broiler pan cooking surface will help prevent sticking…and making cleaning the pan much easier after roasting the Salmon filets.
After prepping the pan, lay the portioned Salmon filets out on the pan, spacing them 1-2 inches apart in every direction. This allows heat from the oven to be equally distributed around the filets and even cooking. Depending on the size and quantity of filets, I usually find Salmon is done within that 12-18 minute range.
It’s not unusual for me to mix up a basting liquid for the filets that I will spoon over the filets 1-2 times as they cook. Very often I’ll use melted butter, lemon juice, a pinch of salt and a complimentary seasoning like Dill Weed, Cajun Spice or whatever best partners with your original seasoning of the filets.
Roast the Salmon filets at 400 – 425 degrees for 12-18 minutes. You will notice a thick, white liquid seeping from the filet as it approaches done. This is Albumen (a protein) seeping out and it’s a great indicator you’re entrée is done!! Don’t overcook Salmon! While you can still eat it…you definitely won’t enjoy it as much as a moist, perfectly seasoned and cooked filet!!
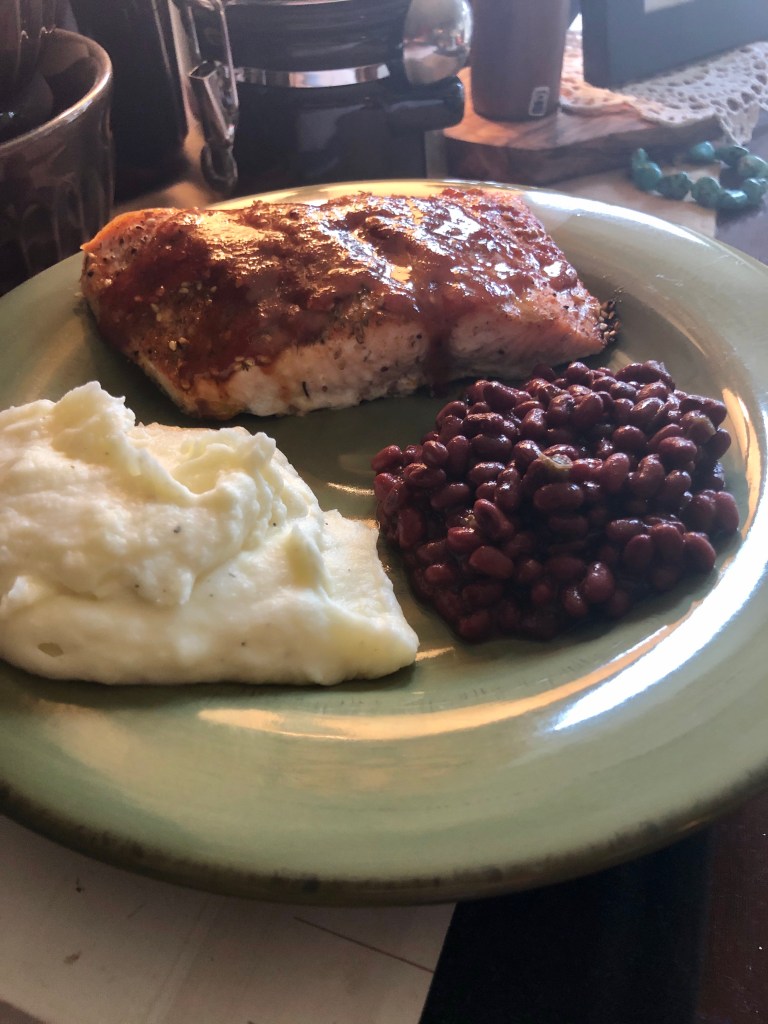
Roasted Salmon with a Mango BBQ Sauce Glaze, Homemade Mashed Potatoes & Hoppin John Field Peas.
There are a lot of great sides to include with your Salmon meal! Roasted Corn on the Cobb; Pan-Seared Lemon Butter Asparagus; Roasted Red Potatoes with Rosemary & Garlic; Italian Cut Green Beans simmered with Country Ham & Sweet Onions; Roasted Sweet Potatoes with Butter, Cinnamon & Molasses; Cajun Seasoned Wild Rice with diced Tomatoes & Sweet Onions; a loaded baked Idaho Potato; Sweet Baby Carrots…the list goes on and on!
I hope you enjoy a great Salmon Filet dinner soon, but even better, that you’ll enjoy it with family and friends…all the more!!!
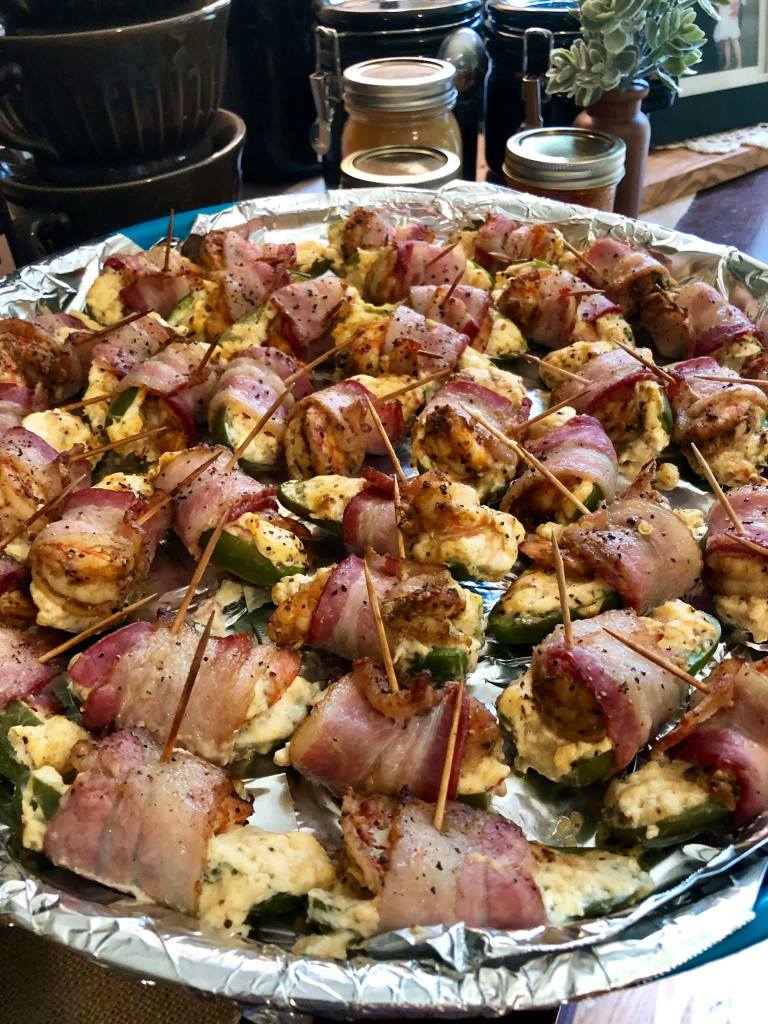
It’s tail gating time in the south!! And nothing goes better with a Fall Saturday afternoon…or at any weekend occasion…than Jalapeno Shrimp Poppers!!!
An all-time Briggs House favorite has to be Jalapeno Poppers!! Now I have to be clear right up front…two things usually made this true at The Briggs House…one, my Mom made them, more on that in a minute…and two, Mom used a very special Jalapeno pepper, right from her garden!
But don’t let any of that discourage you because I have learned that great Jalapeno Poppers can be a hit at your next tail gate party or at any time with family and friends!!
Ingredients Needed:
Pre-heat oven to 375 – 400 degrees. Place racks so that there is ample space to use both racks to hold large broiler pans if you plan on more than 15 – 20 appetizers. Use 375 degrees for one pan; 400 degrees for two pans cooking simultaneously in the oven. Prepare broiler pans by spraying liberally with PAM or other vegetable oil based non-stick cooking spray.
15 – 30 fresh Jalapeno Peppers;
Bacon – 1 full slice of thick sliced bacon for every unsliced jalapeno pepper used. Lay out the bacon slices and cut them exactly in half to achieve two equal length slices of bacon. Lay the cut slices on a plate and return them to the refrigerator while prep continues.
Cream Cheese – 1 to 2 blocks of softened Cream Cheese (1 block will suffice for up to about 20 -30 appetizers. Unwrap the block(s) and place in a medium to large bowl to soften while prep continues)
Shrimp – Fresh Large to Jumbo shrimp – 2 for every whole jalapeno used. (1 on each half. Prepare the shrimp to taste. Grilled, sautéed in Cajun spices and butter, etc. You can also use precooked shrimp that are seasoned to taste. )
Spicy sweet pepper relish/pepper jelly
Toothpicks
Jalapeno Shrimp Poppers – prepped for the oven.
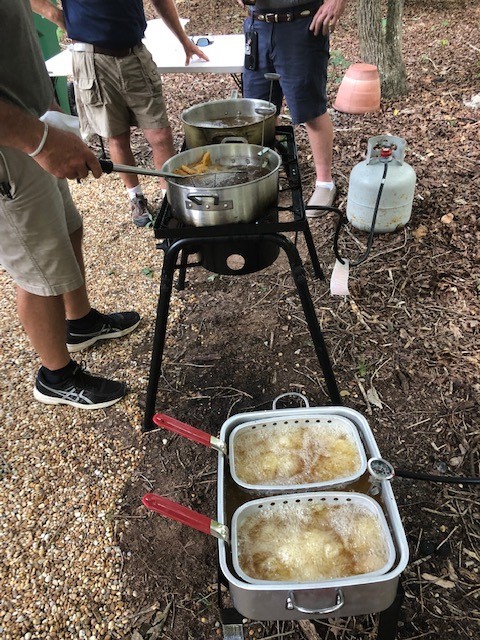
Recently, I was invited by a great friend to a southern classic…an old fashioned Fish Fry!! My friend often hits local lakes and ponds for one of my all time favorites…Crappie!! And he knew, with the schedule I often keep at work, and can’t seem to ever actually go fishing with him…which I would definitely prefer to do (especially instead of work…any day) our friendship could be seriously tested if he fired up the cook pots and didn’t invite me to at least come eat those great fish and all the fixings!!!
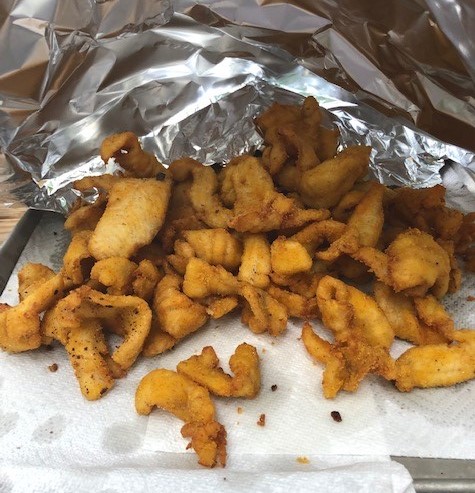
Crappie, Hush Puppies & Home Fries…Deep Fried in Peanut Oil
Southern Fried Crappie
And eat we did!!!
But when I got that invite…having pulled off a fish fry or two myself, I knew there’s a fair amount of prep and cook time involved…and people tend to get a little hungry…and impatient, while the food cooks! Enter Jalapeno Shrimp Poppers!
Now I mentioned earlier, one of the best things about Mom’s Jalapeno Poppers, was that they were hers! While that is true, it’s also true because she did all the work!! Isn’t it amazing how much we realize our parents did for us…after we start having to do it for ourselves…or others!! Jalapeno Poppers are what you might call, slightly labor intensive!! They take a fair amount of prep time…and a little caution along the way! I’ll cover that in a minute. But Mom also used a great variety of Jalapeno Pepper that unfortunately isn’t available just anywhere or in your average grocery store. But I still want you to know about this great jalapeno variety, so you can think about growing your own…in a pot on the back patio or deck, or in your own vegetable garden! And even if you don’t find or use this variety, your Jalapeno Poppers will still be great!! Mom’s variety was called, “Fooled You” Jalapeno Peppers. Mom bought seedling plants from a plant nursery near where she lived in Alabama. I had the pleasure of going with her a few times after Dad died…as she maintained her garden even after Dad was gone. And believe me when I tell you, she didn’t need the food for herself! Her freezers always stayed full…and they were most often only pillaged when I, or my sisters, grandkids or Mom’s friends and neighbors left her house to go back home! That’s when she loaded us all up with the bounty of her hands’ work. And that was after she had often shared straight from the garden itself! Tomatoes, green beans, okra, corn, potatoes, lettuce, peppers…she had…and shared…it all!
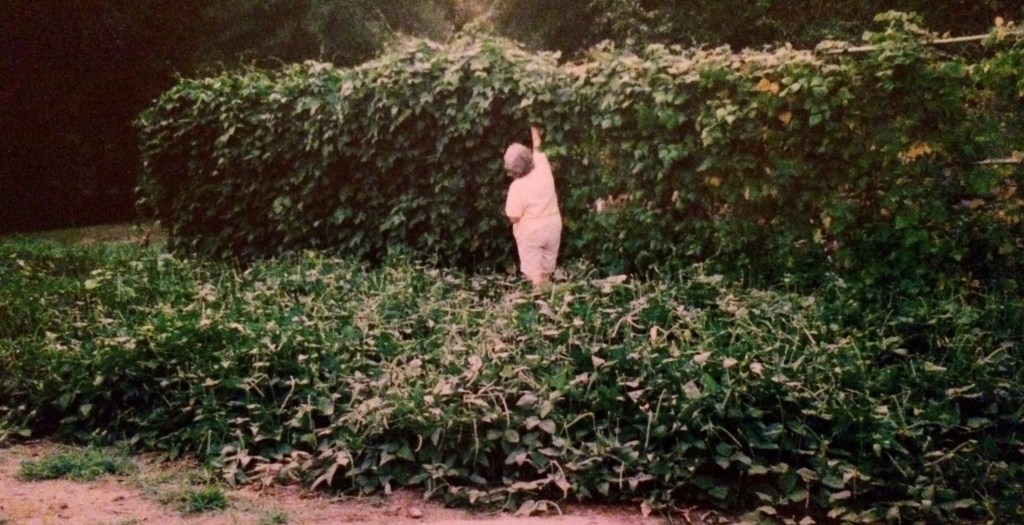
Mom…picking beans in her garden.
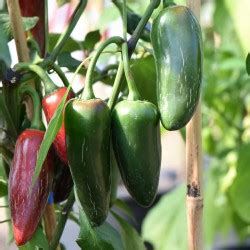
Fooled You jalapeno peppers are a variety of jalapeno with virtually no heat. They have the flavor and appearance of regular jalapenos, but are more akin to the “heat” of bell peppers. They are typically just a bit larger than regular jalapenos at about 3 ¼ inches long and 1 inch wide. This makes them ideal for poppers!! But it’s an important note to consider that these peppers do still have heat! In fact, in my experience, you could always count on a “rogue” pepper or two that gave it all it had to make an impression on the Scoville Heat scale!! These peppers will also turn red if they are allowed to mature to that extent…and they tend to get somewhat hotter, if not also sweeter, as that occurs. But all in all, this variety of pepper will satisfy most pepper lovers for taste, and sufficient and enjoyable heat, while appealing to those that prefer taste over challenging or intolerable heat!
“Fooled You” Jalapeno Peppers
I’m providing one link below for ordering seeds that you can plant and grow your own Fooled You peppers. There are likely local nurseries you can enquire with to purchase seedling plants as well. Full disclosure…I have not ordered from or used this source. But I was pleased to see that with a simple search on Google, it appears there are several sources for this great pepper!
Otherwise, at your local grocery store, or favorite vegetable or produce stand, you are sure to find Jalapeno Peppers up to the task of becoming great Poppers! I don’t always choose the biggest peppers. In fact, I try to select a mixture of sizes as not everyone enjoys eating the larger peppers over being able to “pop” the whole appetizer in their mouth at once with the smaller peppers! But I do like to find peppers that are somewhat firm, have a great, deep, dark green color and are free from most blemishes. I also try to choose peppers that are ideally shaped for slicing along the length and middle of the pepper. In the end, each jalapeno pepper will make two appetizers as I prepare them. There are those that stuff the pepper and put the two halves back together for cooking and serving. There’s certainly nothing wrong with that…it just isn’t how we usually do it at The Briggs House! Choosing peppers that are more evenly shaped and will easily lay flat on the pan while baking in the oven is simply a plus!
The key to great poppers is the same as with many great dishes…preparation! Except in this case, the prep itself can be problematic if you aren’t very careful! It may go without saying…but just to be sure, what makes a jalapeno pepper hot, are the seeds!! After you slice open a jalapeno pepper, you can also see fleshy type veins or splines that are usually white in color. These splines are not as much a part of the pepper’s heat as the seeds…as they are detractors from the overall quality taste and texture you look to enjoy when eating great peppers.
So in your preparation for great poppers, there is some important work to do…slicing the peppers properly, removing the seeds, and removing the splines.
Listen closely…you are about to hear the voice of experience! Learn from it!!
Removing all those seeds in jalapeno peppers can be tedious! The first time I ever made poppers, I thought to myself…there has to be an easier way to do this! Surely Mom didn’t do all this work on those great Poppers I enjoyed for so many years!! My brain child was to “wash” the seeds out of the peppers after slicing them open!! Big mistake!! Some of you may know that at one time, I was a police officer. On more than one occasion, one of the officers I was out on a call with, found reason and justification to use his or her pepper spray on a non-compliant or combative perpetrator/arrestee. It never failed that we were always inside a small house or room when that happened! I hate it when that happens!! Because not only does the bad guy get a dose of that spray, but almost instantly, the air in the whole house is permeated with pepper spray…pepper spray that I then had to breathe and suffer through as my eyes started to fill with tears and swell shut…almost as much as the guy that took the direct hit!!
Well, let me just say that the first time I made poppers and tried to wash the seeds out of the peppers, everybody in my house had to run out the back door!! That water seemed to just diffuse all the heat out into the air and the coughing and sneezing that ensued was pretty dramatic!
So suffice it to say, there is a better way…but washing those peppers is not it!!
You will see some pictures below that illustrate how I now prep jalapenos for poppers. I’ll have to add something here that I usually do but didn’t when I asked my wife Sheila to take these pictures for the blog. A good pair of latex gloves goes a long way in keeping you safer when handling and preparing jalapenos! It will only take one time of you rubbing your eyes or scratching your nose after handling jalapenos for you to know you never want to do that again!! In fact, it’s put many people in the emergency room to get over it!! Using those latex gloves is not a sure thing…but they help tremendously!!
Prepping Jalapenos for Poppers
As you begin your preparation of poppers, like other food prep, a well balanced, and well sharpened knife is always a must! I won’t take the time here to talk knives, knife skills, or even all the safety precautions such a stable cutting surface, a great cutting board…and so on, but please take the time and all the steps to stay safe in the kitchen!!
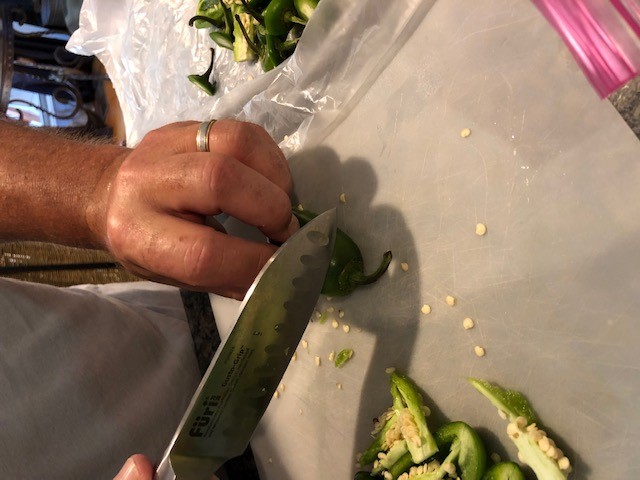
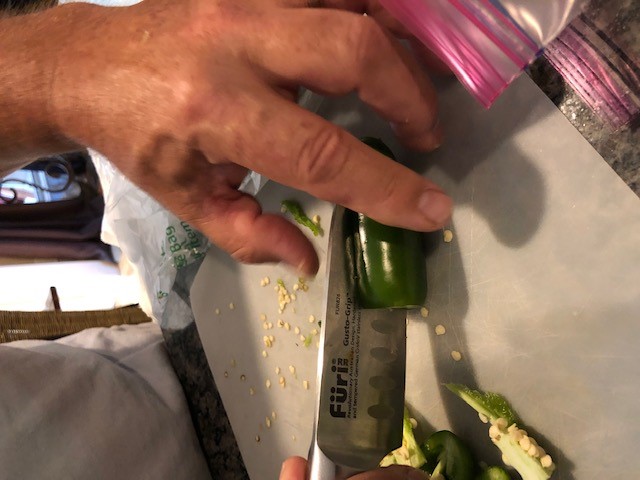
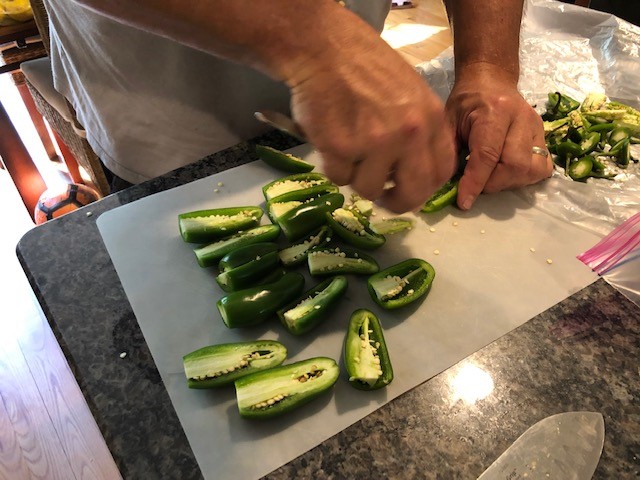
I start by cutting the stem ends off of the peppers as seen in the picture above. Next, I turn the pepper and carefully slice it longitudinally into two halves as shown below.
Slicing the jalapeno pepper length wise into two halves.
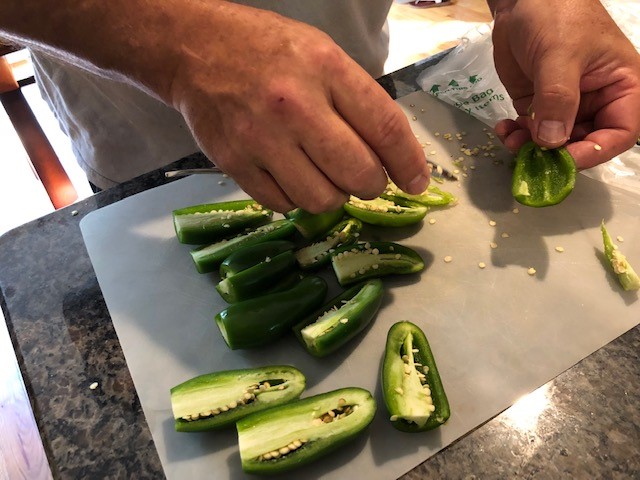
Next, after laying out the halves, I take a smaller, and if possible, a sharper edged spoon that has a more oval than square shape to it to begin removing the seeds and white, fleshy, splines of the jalapeno pepper.
Using a spoon to remove seeds and spline of the jalapeno pepper.
I use the tip of the spoon to carefully but deliberately run it along and on top of the inner green pepper portion so as to run right at the base of the white spline. One continual motion will usually collect the spline and most all the seeds in one pass toward the top or stem end of the pepper. You may have to remove a few seeds by hand but you can actually wait to do that later. I typically place the de-seeded peppers in a zip lock bag to stage them prior to moving to the next step.
A “cleaned” or de-seeded pepper, ready for the filling!!
Let’s talk quantity for a second…
As I mentioned, the way we prepare poppers at The Briggs House, each jalapeno pepper produces two appetizers. What I didn’t really tell you before is that these poppers go fast!! There are definitely some people that have a very low heat and spice tolerance for their food. But overall, if you do the work to remove the seeds and splines entirely from your peppers, most people that eat them are pleasantly surprised to discover they aren’t that hot…even if you aren’t able to use Fooled You peppers! With that, you will find many more people than you think might, will not only enjoy them…but come back to the tray for seconds, thirds…or make a meal of them!! Bearing in mind that 30 jalapenos make 60 appetizers, I would prepare this many for a party of up to 20 -30 adults…at least the first time you make them…and as long as there are other appetizers in play. The second time you make them for the family or same group of friends…I bet you find you need to make more!! This amount should ensure that you have enough for all to have at least one or two if they choose, and take care of the gluttons in the group too! And, you may possibly even have a few left over which can be refrigerated and re-heated. I’ll be clear here though…I’ve never refrigerated or stored these poppers for later…I’ve never had any leftovers!!
Once all the peppers are de-seeded, they are ready for stuffing! And this is where I’ve added a little something extra to how Mom always made poppers!!
Begin by checking the cream cheese you placed in a large bowl earlier to see if it has softened sufficiently to mix easily with a large spoon. If not, a short time in the microwave should finish the job. Just be careful not to begin to cook the cream cheese.
Many of you may be familiar with the appetizer often prepared around Christmas that calls for softened cream cheese to be placed in the center of a plate and then covered with either red or green (or both) pepper jelly. You then use Club or other types of crackers to dip in and eat the incredible combinations of cool cream cheese and spicy jelly flavors!
This is essentially what we are aiming for here with the stuffing for the poppers!! Later in The Briggs House Food Blog, I will share a great recipe for my Mom’s Pear Relish! And this is what I often use to mix with the softened cream cheese for my Poppers! It has just the right amount of spiciness, sweetness and even some slightly crunchy texture that works great for the poppers! If you have access to this sort of relish or another that sounds good to you…go for it! But adding red or green pepper jelly will do the trick too!!
So much of my cooking circles around smell and taste while I am cooking! It’s hard for me to talk quantities for many ingredients because it so often comes down to the tastes I know my family typically enjoys…and how the food smells to me as it cooks. I know that may seem strange…or even frustrating…but very often, I can tell by smell alone if a particular food needs more spice or even salt. The amount of relish or pepper jelly you add to your cream cheese for poppers is largely a matter of your tastes. You also don’t have to add anything to the cream cheese…and the poppers will still be great!! After all, we will soon be adding bacon to this equation…and you can never go wrong with bacon!!
Make sure you have washed your hands thoroughly and/or you can use a fresh pair of latex gloves to stuff the peppers.
Remove the plate of sliced bacon from the refrigerator and place it near the area you will complete preparation of the poppers.
I add enough relish or pepper jelly to arrive at a slightly spicy mixture, add a pinch or two or black pepper as well as salt if you feel the flavors are a little bland in the mixture. I then begin removing Jalapeno pepper halves from the zip lock bag and placing them on my cleaned cutting board. Bring the broiler pans nearby and begin spooning small portions of the cream cheese mixture into the Jalapeno halves. You want to be somewhat conservative here. I like to fill the half slice just so the cheese reaches the top of the slice. You can use your finger to make the mixture even with the top of the slice…and place any extra back in the bowl for adding to another slice.
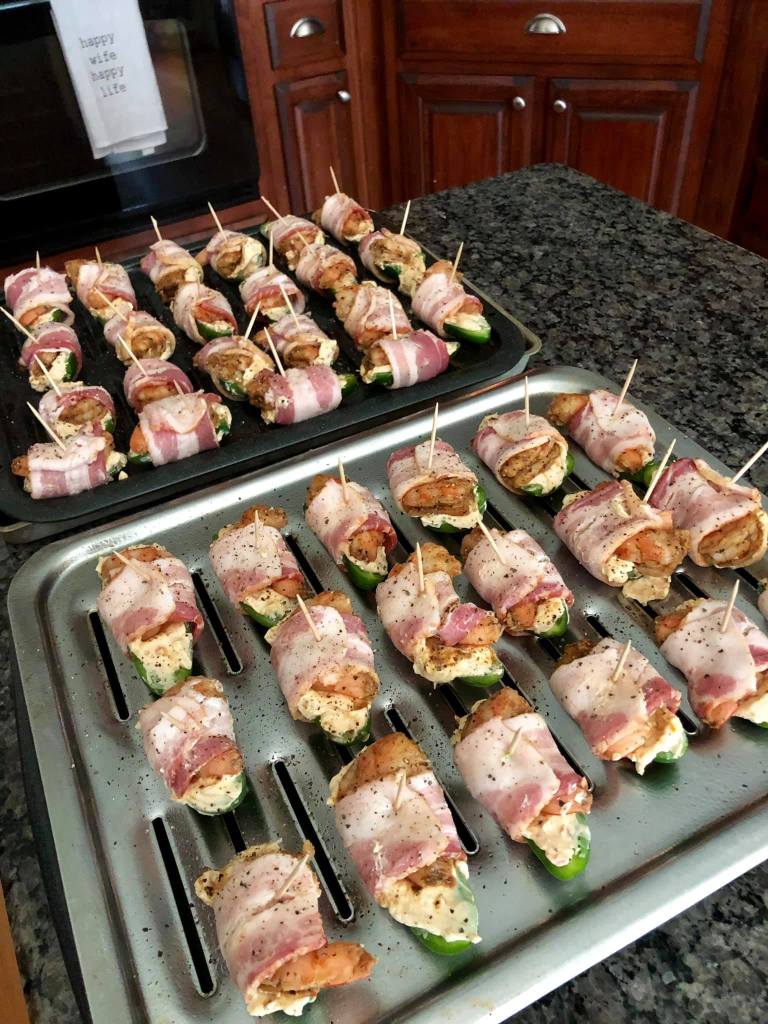
Once the cream cheese mixture has been added to the sliced pepper, take 1 prepared shrimp and carefully lay it over the cream cheese side of the half-slice of jalapeno pepper. Take one half-slice of bacon and place one end at the center or slightly over one edge of the pepper, covering the piece of shrimp. Carefully wrap the bacon around the underside of the pepper and then wrap it back over the top, overlapping the portion of the bacon placed previously. Lay the Popper with the bacon held in place back on the cutting board and stick a clean toothpick through the two layers of bacon, through the cream cheese and into the bottom of the popper until it strikes the cutting board. Carefully place the prepared Popper on the broiler pan and repeat until the pan is full of Poppers.
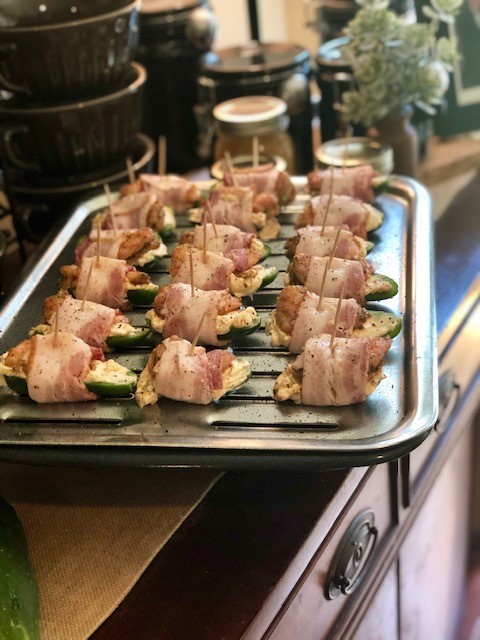
40 Jalapeno Shrimp Poppers using 20 Jalapeno Peppers – ready for baking!
It’s generally a good idea to leave space between any items being baked. The picture above illustrates a good spacing for the Poppers. However, I have placed the prepared poppers touching each other to get more out of each bake with no issues.
I typically bake these Poppers for approximately 30 minutes. Quantities and size of peppers may vary cook times. How done you prefer bacon can play a role in cook time. We prefer the bacon to be slightly chewy with these poppers (really any time) but moreover, what usually rules to know when these poppers are ready is if…and when the cream cheese begins to cook out of the pepper and out onto the pan, they need to come out of the oven. There’s a much greater chance of this if you have “over-stuffed” the pepper with the cream cheese mixture during prep…so this can be a bit of a trial and error process!! It’s also a good idea to swap the lower pan of poppers with the upper pan about half way through the cooking time! You should also begin to see the cream cheese mixture become slightly browned at the end of cooking.
When the Poppers are done, carefully remove the pans from the oven and place on a safe and sturdy surface to allow the Poppers to cool for about 5 – 10 minutes before placing them on a flat serving tray of your choice. This can be tricky…not only because the first bite of a popper that hasn’t cooled slightly, is more likely to hold steam within the cream cheese mixture or moisture from the pepper…which then can almost squirt as you bite them and burn your mouth…but also because there will be a line of people forming to take that risk!!! The smells in your kitchen at this point have brought everyone in a 5 mile radius to get their hands on whatever has been going on in your house!!
While the Poppers cool, I like to add another sprinkle of coarse ground black pepper and maybe just a touch of coarse salt too for taste and appearance!! One last caution…make sure those that are younger (or those who may be heavily influenced by the great cocktails you prepare to serve with the Poppers) know to remove the toothpick prior to eating the poppers!! You might even choose to remove them all…just let them all cool first as they hold together better as the bacon cools and contracts.
Ready to eat – Jalapeno Shrimp Poppers – from The Briggs House!!
You are now ready to watch the spectacle unfold and become the superstar of any gathering…with Briggs House Jalapeno Shrimp Poppers…enjoy!!!!
Let me know how yours turn out…what additions or changes you make…and as always, how I can help you fall in love with cooking and feeding those you care about most…like the Briggs House!! Follow my blog and feel free to comment on all my blog posts!! Thanks for cooking with me!!!
I’ll start with a disclaimer…I always reserve the right to change my mind at any time, especially when deciding what and when to cook…and what might be my favorite meal!!
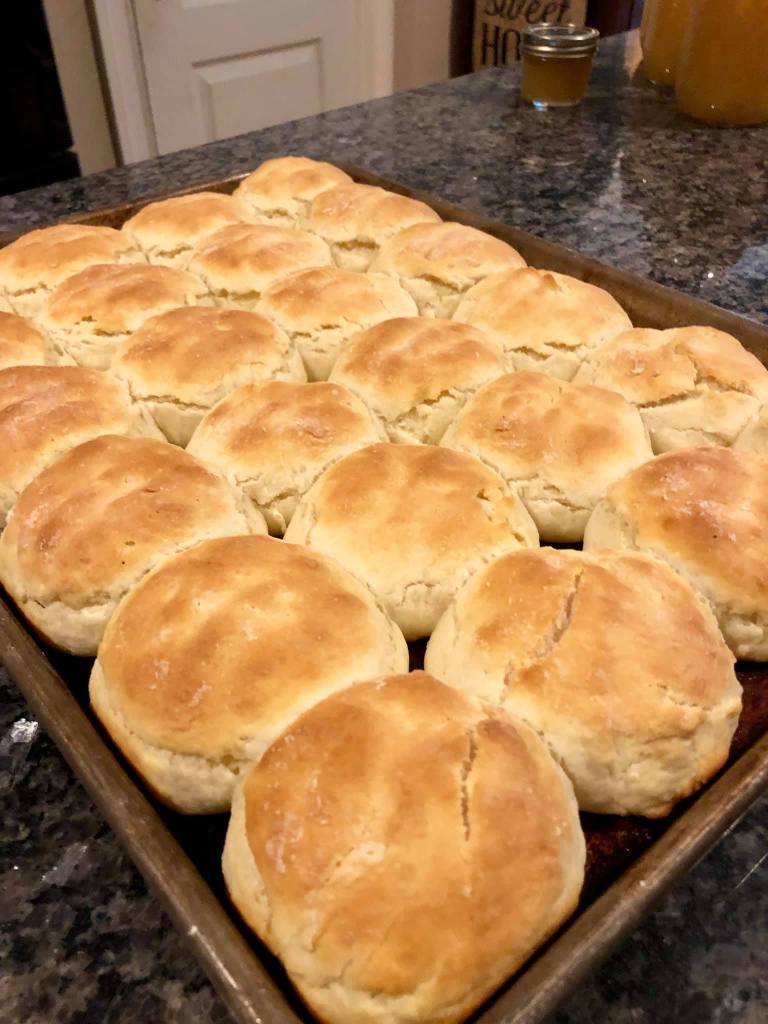
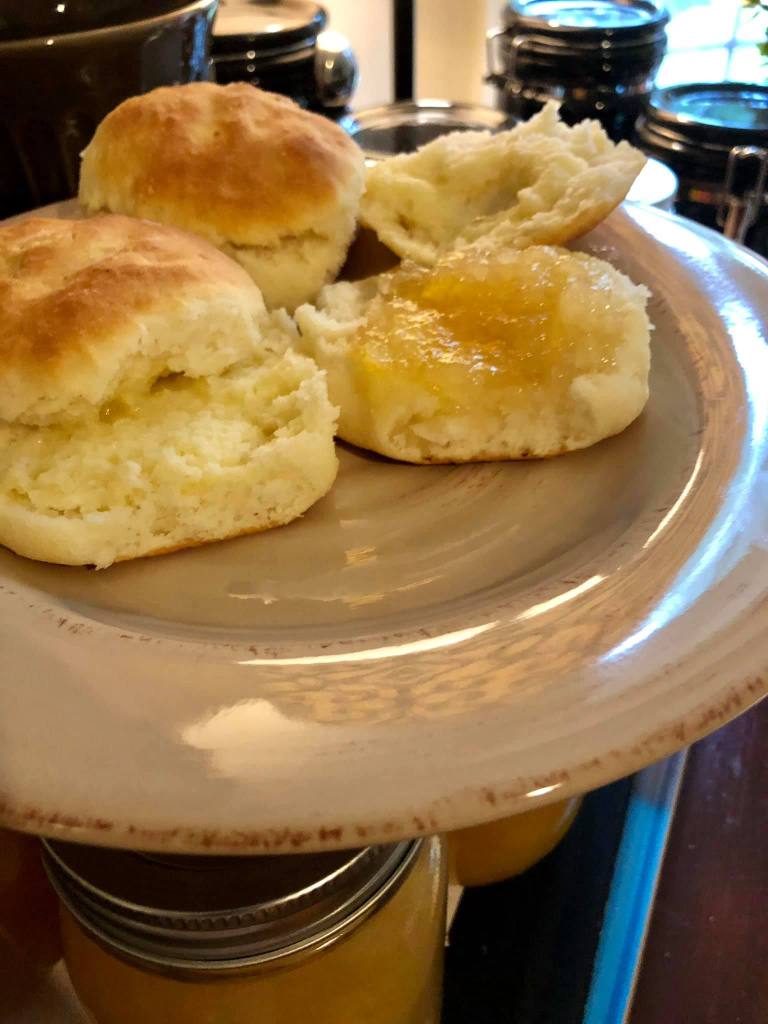
Now that the legal stuff is out of the way, my favorite food, and my favorite meal…has to be breakfast! If you’ve read my previous blogs, this shouldn’t be a surprise! With so many of my best memories revolving around Mom cooking at breakfast time, it would be hard. Mom made really good biscuits. They were sort of like…and then again, unlike any biscuit you could think of or compare. Mom’s biscuits were not tall and fluffy. In fact, they were almost flat, barely rising from their original size and shape when baked. But they had an even more unique flavor, and easily stood up to at least two important tests! One, they didn’t fall apart when split to put butter inside them (or when dragged through a plate of syrup or molasses and butter either for that matter) and, they tasted just as good way on down in the afternoon as they sat as leftovers on the stovetop, grabbing you as you tried to sneak by without eating your 3rd, 4th or 5th of the day!! Don’t judge…this is food science we’re discussing here!!! I’ll be honest, I’ve never mastered Mama’s biscuits. And thank God, literally…I don’t need to. I am blessed in so many ways…not the least of which is to be married to a woman who makes the best biscuits in town!! Sheila’s Buttermilk Biscuits are the best I’ve ever had! But unlike Mom’s and as good as they were…Sheila’s are tall, fluffy and flaky inside!!
Hot out of the oven…Sheila’s Buttermilk Biscuits!!
They hold up to all the same important scientific tests mentioned before and then some!!!
But for me…I’m a little old…actually, really old school when it comes to what I enjoy most on a biscuit! For jelly or preserves, there’s nothing better on a biscuit than homemade Pear Honey!! “WHAT’S THAT?” you ask…that, is something that will change your life at breakfast…and something you’ll have to keep reading The Briggs House Food Blog to find out about!!!
And if we’re going to talk biscuits…and breakfast…we have to talk gravy, at The Briggs House! Now let’s be clear…I love white gravy, made with whole milk, sausage or hamburger, hot from the stove top, lots of black pepper, a touch of hot sauce…or several touches…on the first plate or so anyway…I might leave it off for the last plate or two!!
But we are also supposed to be talking about my favorite breakfast here…so we have to start to bring this thing together here! I mean at some point, we have to stop writing, reading and imagining this meal…and get to cooking and eating it!
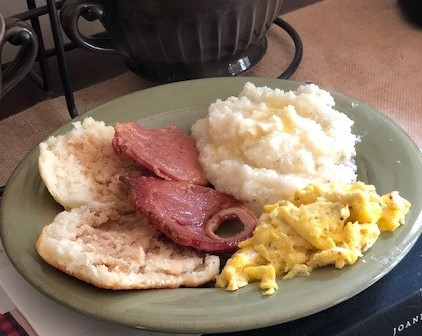
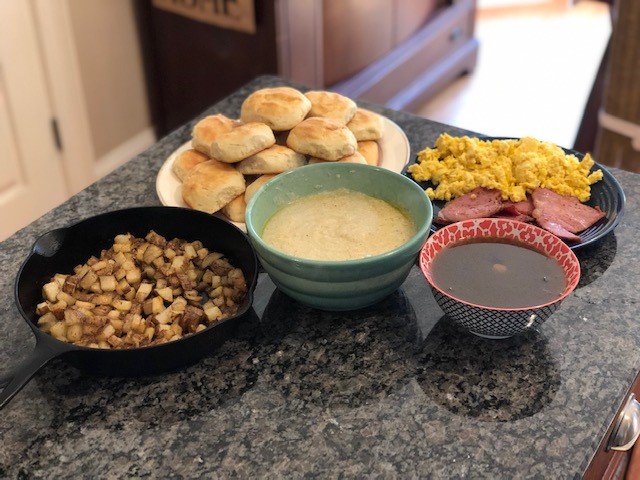
So let’s get the right picture here…two hot buttermilk biscuits split open on the left of the plate. Soft, scrambled cheese eggs sit off to the right side. Next, two slices of Country Cured Ham sit right in the middle of the plate, slightly overlapping that split biscuit! Up top, is a large helping of well buttered and salted grits! And last, and not only not least, but most importantly…Red Eye Gravy, prepared in a scalding hot black cast iron skillet and poured up in a perfect size bowl with bits of ham settled at the bottom of the bowl…is spooned over the soft, delicate and fluffy open faced biscuit!! Don’t worry, in fact, make sure a little of that Red Eye Gravy finds its way on to the top of those grits!! Perfection on a southern breakfast plate!!
Country Ham Breakfast
So how do we pull this off??
First, always try to use the freshest eggs possible. An old tried and true test for knowing how fresh your eggs are goes like this…place an egg in a small measuring cup or bowl of water. Place the egg in the water, If the egg settles to the bottom on its side, it’s s fresh egg!! If the egg sits at the bottom of the water, but stands on its end, it’s still fresh enough to scramble or fry and eat…but you can also consider using this egg to boil and eat later. If the egg floats to the top, the egg is likely past it’s usefulness…other than maybe a compost pile…rather than a trash can.
On a hard surface, such as the counter top (that is clean) gently crack the eggs by striking them at their sides on the top and while holding the shell briefly together move your hand over a bowl and allow the egg white and yolk to drop into the bowl Be careful not to allow shells into the bowl with the eggs, and remove with a fork or spoon if any shell falls into the bowl. Crack and drop two eggs for each person eating them…plus 1-4 more, depending on who is eating and how much they like eggs!! Salt and pepper the eggs to your liking and dietary needs.
Next, using a dinner or salad fork (ok, if you watch cooking shows on TV, you can use a small whisk) slowly at first, then rapidly, whisk the eggs for at least 1 minute or more to force as much air into the scrambled mixture as possible. This will help the eggs retain a fluffiness after they are cooked. Egg doneness is in many ways a personal preference. As for me, when I cook scrambled eggs, I prefer using a non-stick skillet over low to medium heat. Drop butter or margarine in sufficient quantity to coat the entire surface of the bottom of the pan and when thoroughly melted, slowly pour the scrambled egg mixture into the hot pan. A little sizzle is fine. But the pan should not be so hot as to immediately begin crunching the edges of the mixture. If it is, no worries…begin stirring the eggs with a spatula while briefly removing the pan from the heat. Consider lowering the heat level slightly and then place the pan back over the flame or heat to continue cooking. I prefer what is referred to as “soft scrambled” eggs. As the eggs begin to solidify as you move them around the pan with the spatula, flip more solid eggs over and with the more liquid mixture, slightly breaking the eggs up as they cook. Watch your moisture level remaining in the eggs. If you like well done or hard scrambled eggs, continue cooking until all moisture is essentially gone. But I look for about 10% – 20% of the moisture remaining and the eggs will have a softer look, and a little less separated than eggs cooked longer. This is when I typically remove the eggs to a clean and correctly sized bowl for the portion I have prepared. Leaving this small amount of moisture in the softly scrambled eggs allows them to come out perfectly as they sit in the serving bowl, continuing to cook slowly until ready for plating. A quick fluff or stir as you bring them to the plate will give them the irresistible look you want to see when you see eggs served with breakfast!!!
This is probably as good of a time as any to talk nutrition and health for just a minute. I understand, and we all should understand, that great food is a wonderful part of a great life! But any food eaten in excess or not in balance with an overall healthy diet and lifestyle can be a powerful adversary to overcome when health issues appear or already exist. On the other hand, eating too little food, or ill-prepared and non-supportive foods out of balance with your lifestyle and nutritional needs can also be just as devastating. To be clear, I’m not a Physician, Nutritionist, or Fitness Expert. And since you’re thinking it…and no, I don’t play one on TV. Each of us has a responsibility to understand our health and diet needs, and meet them appropriately. Now back to breakfast!!
Sometimes I feel Country Ham is a forgotten or unknown part of an American breakfast. Country Ham is pork and cured (cooked) over time with salt and often other seasonings. And while it is cooked and safe to eat within any expiration periods, etc. it’s never better than with breakfast and served with Red Eye Gravy!!
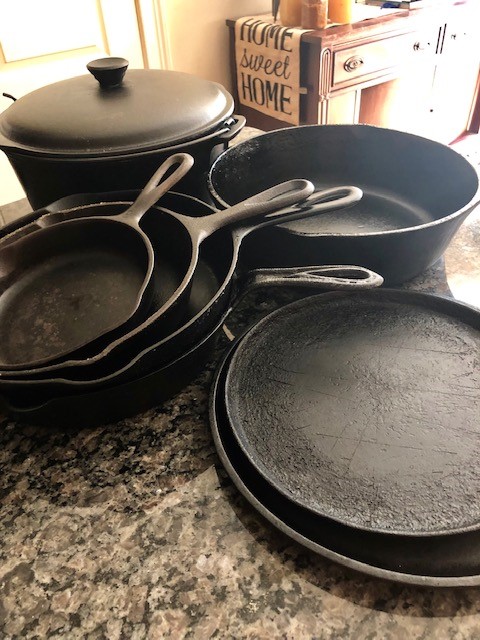
You can purchase Country Ham in most grocery stores near the fresh meat section and it’s often found in small, independent kiosks or shelves near these refrigerated foods. Some stores choose not to refrigerate the packages while others will. Often, there are smaller packages labeled “Biscuit Slices”. I have used these but prefer buying and using the larger packs made up of full size slices…or if you’re really hungry, feeding a lot of people…or want to have some on hand or a while…you can buy a half or whole Country Ham…after you take out a small loan…and go for it!!! I cut the slices into smaller portions and trim any excess fat from the edges…but don’t throw these away, we are about to use them! If you don’t own a heavy, black cast iron skillet, I recommend you get one…or a set if possible! More on that later, but I use cast iron a great deal for many dishes and meals that I prepare.
Some of these have been passed down from Mom’s kitchen, others were collected over time and others, were gifts from family and friends who know I love cooking…and cooking with cast iron!
Just before we start cooking, take a few minutes and go make 1-2 large cups of black coffee. No sugar, cream…no whip cream or caramel drizzle please…that cup of coffee comes later!!! Set the hot, black coffee aside and near the stove top.
Place an 8″ – 10″ cast iron skillet over medium high heat on your stove top. If you have a glass stove top, check manufacturer directions and possibly plan ahead and heat the iron skillet in the oven. Separate or slice the country ham into roughly biscuit size portions. As the skillet begins to heat, add a few pats of butter. After the skillet comes up to temperature, carefully place the ham slices into the hot skillet leaving enough space between them to easily turn the ham as it heats. The ham will sizzle and may smoke slightly. This is a great time to add any excess fat or trimmings you made earlier when preparing the slices. These trimmings will remain in the skillet for the duration of heating all the ham slices you prepare for breakfast. Depending on the thickness of the slices, it usually only takes 1-3 minutes for each side. When turning the slices, you should see where the sugars in the ham have caramelized and stuck to the skillet bottom. This is ok…in fact, it’s exactly what you want and essential to great red eye gravy that you will soon make in this same skillet. Be careful not to overcook the ham. It should still be pliable, tender and glisten rather than stiff or dry in appearance…unless, that’s how you like your ham…to each, his or her own!! You may need to replenish the butter along the way, depending on how many slices you prepare. After all of the slices have been heated and set aside on an open plate…no paper towels…turn the heat under the skillet to its highest setting. All the drippings, butter and caramelized sugars will soon begin to smoke. CAREFULLY…really carefully, pour a cup of the hot black coffee into the hot skillet. Expect, and protect yourself from the significant amount of steam that will rapidly rise from the skillet. With a sturdy spatula, gently begin to scrape any remaining trimmings or caramelized sugars from the bottom of the skillet, while also stirring the mixture. Add a generous amount of black pepper at this point. I like to add 1-2 tablespoons of sugar here, and if I have one, I’ve been known to add about half of a can of Coca-Cola at this point as well. Allow the mixture to continue to simmer rapidly for 3-4 minutes then reduce the heat to a low simmer. Take a metal dinner spoon and taste test the gravy when it cools enough to do so. The flavor should be a balanced…not too string from the coffee, not to sweet from the sugar or Coca-Cola…and you can adjust either way, using more sugar, coke or black coffee that was held in reserve. When the taste is where you want it, turn the heat off, and add the plate of ham slices and all the drippings that have gathered in the plate back into the skillet to finish off the flavor of the Red Eye Gravy and hold or return moisture to any slightly over cooked ham…and hold the heat until ready to serve.
For presentation, you can serve straight from the skillet, or pour up all of the ham and red eye into a large bowl. You can also separate and plate the ham separately from the gravy that you may place in an appropriate sized serving bowl. One thing to consider…it’s easy to not have enough Red Eye Gravy when you first learn how to prepare it…so as my Dad always used to say, if the Cook goes hungry, it’s their own fault!!!
A Country Ham Breakfast with Red Eye Gravy & Skillet Potatoes
Another great use for the Red Eye Gravy in this meal, is to pour a spoon or two over the grits after they are plated!! There are plenty of directions out there for grits…including on the package! For now, I’ll just say if you’ve ever had great grits or bad grits, you knew it at first bite!! And in both cases, the result almost always has something to do with 3 ingredients…Butter, Salt…and cooking time!! Too little butter or cooking time…grits are NOT going to be great! Too little, or too much salt…grits are not going to be great!! At The Briggs House, we typically use real butter, and coarse salt. We also often use stone ground grits, but have found that the 5 minute grits work very well, IF…you cook them covered, on the stove top, and for at least 15 – 30 minutes…making sure to check that they have enough water or milk along the way. You can of course add cheese, cream cheese, cook the grits in chicken broth or use half and half, sour cream…the list is limitless and dependent on your tastes…and imagination!
I cant wait to hear how about your favorite breakfast!!!
Laurie Colwin was a writer and novelist who was also regularly featured in Gourmet magazine. She once wrote, “No one who cooks, cooks alone…” It’s probably difficult or even non-sensical for some…and I’m going to assume, especially for those that may not enjoy cooking, or believe it’s merely a means to an end, that they have missed the great connection cooking provides to some of the most valuable and important treasures of life. Every one who cooks…cooks with someone. Now, I have to admit, a kitchen can be a crowded place! Ask anyone in my family and they would say it’s probably not a good idea to get in my space when I’m cooking! But despite how that sounds, and probably looks to the family, I assure you that has more to do with logistics and a poorly laid out kitchen…and the apparently unavoidable consequence of getting older and wearing bi-focals, than it is about having people around and enjoying them, and sharing cooking with them! But no matter where I’m cooking, in the kitchen of my house or at the grill out by the pool, I am never alone.
Some of my earliest memories are of my Mom cooking…in the kitchen, wherever our house may have been. My Dad was a Pastor and we moved often as I was growing up. From as early as when I was 4 or 5 years old, I remember waking up on summer mornings to a quite and empty house. I could hear the katydids humming outside and feel the unmistakable, growing heat of the morning sun, its heat beginning to slowly bake the outdoors like an oven slowly rising to baking temperature. The emptiness was not because I was a latchkey kid at 4…there was really no such thing I don’t think in the 60’s…but because Mom had long been in her garden, picking beans, tomatoes, cucumbers and okra…whatever was ripe, or nearly ripe. The kitchen window seal or countertop would soon be the host of all she had gathered. About the only thing that would interrupt the harvest was me appearing beside her…barefooted, in my pajamas, and eager to “help”…at which point she would show me how to pick the right picks until I lost interest. Then, after a few minutes, and hot from the ever rising summer sun and heat, she would ask, “Can I get you something to eat?” And off we’d go, to the kitchen. She’d scramble eggs, cook sausage, take her biscuits she had made long before and kept frozen in the freezer, out and into the oven. Some very special mornings…really anytime I would ask, her biscuits would be combined with one of my favorites…her hamburger gravy! Most of these mornings in my memory were just the two of us…my sisters were in school…summer break had not started yet…and I would sit, and watch her cook…alone.
Very often, around the holidays…Christmas or Thanksgiving…but at times during the summer, we’d take a trip to my Granny’s house in south Alabama. Years later, as I thought about those trips, and I thought about the early mornings at Granny’s house, and the smells of breakfast cooking as I woke and found my way to the kitchen, where Mom and Granny often stood cooking, side by side. They moved and talked and laughed inside the old, wooden walled kitchen, with a wood burning fireplace at one end, and a long, hand made pine table that had benches and ladder back chairs around it. It would seat at least 10 or 12 people, but still seemed somewhat small when all of us gathered to eat there in the middle of that large kitchen. Over those childhood years, I realized that every time I saw Mom cook at Grannys, she was never alone. Many foods she cooked, she cooked for our family because her Mama cooked those foods…and taught her how to cook them. Every sprinkle of salt, dash of pepper…when and how she turned the food as it cooked…or how she smelled the food or tasted it as she prepared to serve it, even the bowls or platters she chose to serve the food in…she did it with Granny right there with her…even when Granny was long gone. Over the years, Mom no doubt tweaked, refined, and added foods that Granny probably couldn’t afford or had no access to in a small farming community…or that her sons and my Uncles didn’t grow on their farm…but in it’s essence…and in all those kitchens, long after Granny had left…Mom never really cooked alone.
Today, I don’t think there’s ever a time that I’m cooking, that Mom isn’t right beside me. I remember far less than I wish I could. I missed opportunities along the way. I miss Mom…all of you who are separated from your Mom, for whatever reason, or from anyone that made your life so special, that made you who your are…knows there’s probably nothing you wouldn’t do to talk with them or stand next to them, or hug them one more time. When in my kitchen, I often wish I could ask her so many things about cooking…about life, about heaven…
But then I am reminded, I may be the luckiest man alive…there in that small, poorly laid out kitchen, Mom is right there with me as I cook…as much as is possible, how she cooked…and for a moment, I’m so glad my kitchen is just the right size, for Mom to stand close by.
For some time now, friends, family…and occasionally, someone I hardly know, has said, “You should do a Food Blog!” I enjoy cooking. I’m not a chef…not by a long shot! And, I have such great respect for those that have gone to culinary school, studied, struggled and worked so hard to find success at any level preparing food for others! And it’s on that common ground that I stand with so many of them who get pure joy form the privilege of cooking and sharing good food with family, friends, and now…you through The Briggs House Food Blog!! I truly hope you enjoy the glimpse of the The Briggs House that I plan to share through this medium!
So who…or what is The Briggs House?
Well for starters, I’m obviously not an original…nor is our house or much of the food that has been prepared across generations of our family. There have been a few items along the way that I’ve never seen anywhere before, or a nearly unique way of preparing or serving one course of food or another. But all in all, like most families, and the food eaten around the tables in their kitchens, dining rooms and on top of their knees or coffee tables in front of the TV, what is always unique and special are the hands that provide and prepare that food…and so often, teach us and pass along through us the important heritages and traditions found and celebrated with food!
In The Briggs House Blog, you will find out about what we like to eat; what others have said they liked that we served them; and how we came to love hearing from the friends of our kids, that they wanted to go eat at the Briggs house…even in the morning before school sometimes!!! And, I’ll try to tell you how I like to cook that food, share some recipes and pictures and if you’ll put up with me, even share a thought or two along the way that will hopefully encourage you, even inspire you to enjoy time with family and friends through preparing food for those you love and are important to you in life! Let’s get started…at the beginning!!