Until I tell you about another one….
I’ll start with a disclaimer…I always reserve the right to change my mind at any time, especially when deciding what and when to cook…and what might be my favorite meal!!
Now that the legal stuff is out of the way, my favorite food, and my favorite meal…has to be breakfast! If you’ve read my previous blogs, this shouldn’t be a surprise! With so many of my best memories revolving around Mom cooking at breakfast time, it would be hard. Mom made really good biscuits. They were sort of like…and then again, unlike any biscuit you could think of or compare. Mom’s biscuits were not tall and fluffy. In fact, they were almost flat, barely rising from their original size and shape when baked. But they had an even more unique flavor, and easily stood up to at least two important tests! One, they didn’t fall apart when split to put butter inside them (or when dragged through a plate of syrup or molasses and butter either for that matter) and, they tasted just as good way on down in the afternoon as they sat as leftovers on the stovetop, grabbing you as you tried to sneak by without eating your 3rd, 4th or 5th of the day!! Don’t judge…this is food science we’re discussing here!!! I’ll be honest, I’ve never mastered Mama’s biscuits. And thank God, literally…I don’t need to. I am blessed in so many ways…not the least of which is to be married to a woman who makes the best biscuits in town!! Sheila’s Buttermilk Biscuits are the best I’ve ever had! But unlike Mom’s and as good as they were…Sheila’s are tall, fluffy and flaky inside!!
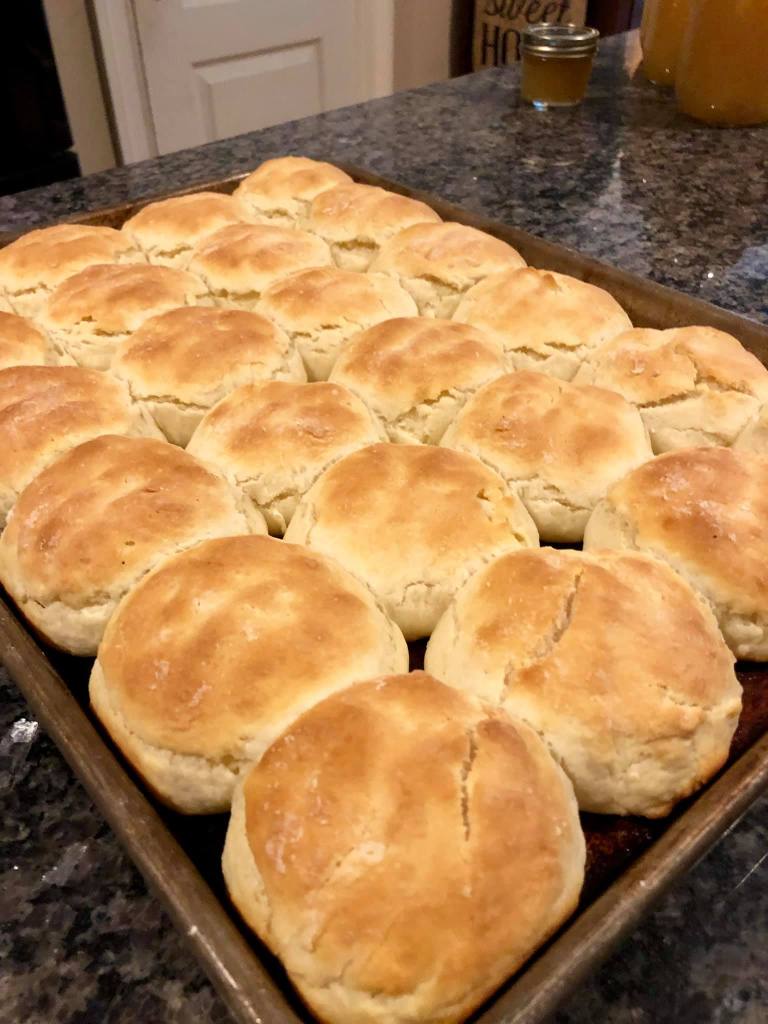
They hold up to all the same important scientific tests mentioned before and then some!!!
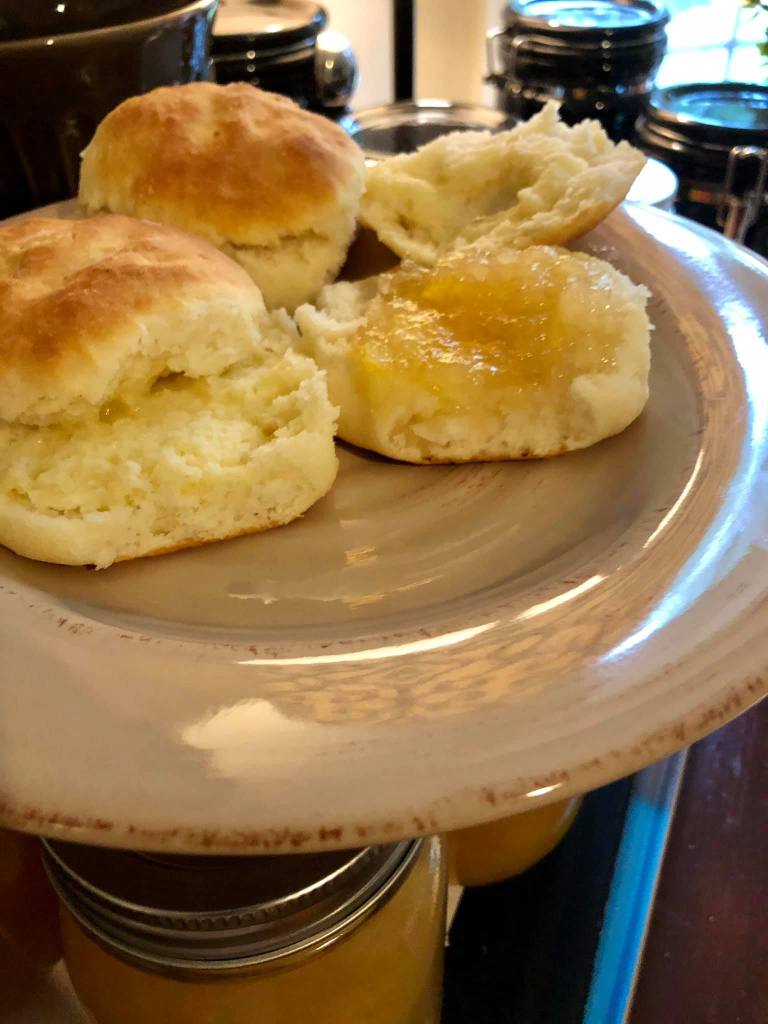
But for me…I’m a little old…actually, really old school when it comes to what I enjoy most on a biscuit! For jelly or preserves, there’s nothing better on a biscuit than homemade Pear Honey!! “WHAT’S THAT?” you ask…that, is something that will change your life at breakfast…and something you’ll have to keep reading The Briggs House Food Blog to find out about!!!
And if we’re going to talk biscuits…and breakfast…we have to talk gravy, at The Briggs House! Now let’s be clear…I love white gravy, made with whole milk, sausage or hamburger, hot from the stove top, lots of black pepper, a touch of hot sauce…or several touches…on the first plate or so anyway…I might leave it off for the last plate or two!!
But we are also supposed to be talking about my favorite breakfast here…so we have to start to bring this thing together here! I mean at some point, we have to stop writing, reading and imagining this meal…and get to cooking and eating it!
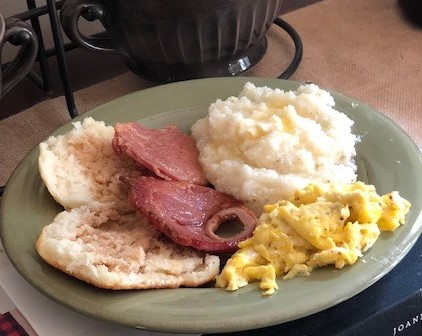
So let’s get the right picture here…two hot buttermilk biscuits split open on the left of the plate. Soft, scrambled cheese eggs sit off to the right side. Next, two slices of Country Cured Ham sit right in the middle of the plate, slightly overlapping that split biscuit! Up top, is a large helping of well buttered and salted grits! And last, and not only not least, but most importantly…Red Eye Gravy, prepared in a scalding hot black cast iron skillet and poured up in a perfect size bowl with bits of ham settled at the bottom of the bowl…is spooned over the soft, delicate and fluffy open faced biscuit!! Don’t worry, in fact, make sure a little of that Red Eye Gravy finds its way on to the top of those grits!! Perfection on a southern breakfast plate!!
So how do we pull this off??
First, always try to use the freshest eggs possible. An old tried and true test for knowing how fresh your eggs are goes like this…place an egg in a small measuring cup or bowl of water. Place the egg in the water, If the egg settles to the bottom on its side, it’s s fresh egg!! If the egg sits at the bottom of the water, but stands on its end, it’s still fresh enough to scramble or fry and eat…but you can also consider using this egg to boil and eat later. If the egg floats to the top, the egg is likely past it’s usefulness…other than maybe a compost pile…rather than a trash can.
On a hard surface, such as the counter top (that is clean) gently crack the eggs by striking them at their sides on the top and while holding the shell briefly together move your hand over a bowl and allow the egg white and yolk to drop into the bowl Be careful not to allow shells into the bowl with the eggs, and remove with a fork or spoon if any shell falls into the bowl. Crack and drop two eggs for each person eating them…plus 1-4 more, depending on who is eating and how much they like eggs!! Salt and pepper the eggs to your liking and dietary needs.
Next, using a dinner or salad fork (ok, if you watch cooking shows on TV, you can use a small whisk) slowly at first, then rapidly, whisk the eggs for at least 1 minute or more to force as much air into the scrambled mixture as possible. This will help the eggs retain a fluffiness after they are cooked. Egg doneness is in many ways a personal preference. As for me, when I cook scrambled eggs, I prefer using a non-stick skillet over low to medium heat. Drop butter or margarine in sufficient quantity to coat the entire surface of the bottom of the pan and when thoroughly melted, slowly pour the scrambled egg mixture into the hot pan. A little sizzle is fine. But the pan should not be so hot as to immediately begin crunching the edges of the mixture. If it is, no worries…begin stirring the eggs with a spatula while briefly removing the pan from the heat. Consider lowering the heat level slightly and then place the pan back over the flame or heat to continue cooking. I prefer what is referred to as “soft scrambled” eggs. As the eggs begin to solidify as you move them around the pan with the spatula, flip more solid eggs over and with the more liquid mixture, slightly breaking the eggs up as they cook. Watch your moisture level remaining in the eggs. If you like well done or hard scrambled eggs, continue cooking until all moisture is essentially gone. But I look for about 10% – 20% of the moisture remaining and the eggs will have a softer look, and a little less separated than eggs cooked longer. This is when I typically remove the eggs to a clean and correctly sized bowl for the portion I have prepared. Leaving this small amount of moisture in the softly scrambled eggs allows them to come out perfectly as they sit in the serving bowl, continuing to cook slowly until ready for plating. A quick fluff or stir as you bring them to the plate will give them the irresistible look you want to see when you see eggs served with breakfast!!!
This is probably as good of a time as any to talk nutrition and health for just a minute. I understand, and we all should understand, that great food is a wonderful part of a great life! But any food eaten in excess or not in balance with an overall healthy diet and lifestyle can be a powerful adversary to overcome when health issues appear or already exist. On the other hand, eating too little food, or ill-prepared and non-supportive foods out of balance with your lifestyle and nutritional needs can also be just as devastating. To be clear, I’m not a Physician, Nutritionist, or Fitness Expert. And since you’re thinking it…and no, I don’t play one on TV. Each of us has a responsibility to understand our health and diet needs, and meet them appropriately. Now back to breakfast!!
Sometimes I feel Country Ham is a forgotten or unknown part of an American breakfast. Country Ham is pork and cured (cooked) over time with salt and often other seasonings. And while it is cooked and safe to eat within any expiration periods, etc. it’s never better than with breakfast and served with Red Eye Gravy!!
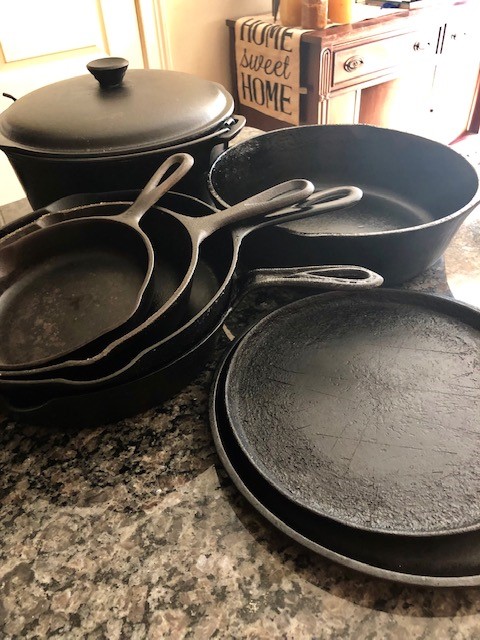
You can purchase Country Ham in most grocery stores near the fresh meat section and it’s often found in small, independent kiosks or shelves near these refrigerated foods. Some stores choose not to refrigerate the packages while others will. Often, there are smaller packages labeled “Biscuit Slices”. I have used these but prefer buying and using the larger packs made up of full size slices…or if you’re really hungry, feeding a lot of people…or want to have some on hand or a while…you can buy a half or whole Country Ham…after you take out a small loan…and go for it!!! I cut the slices into smaller portions and trim any excess fat from the edges…but don’t throw these away, we are about to use them! If you don’t own a heavy, black cast iron skillet, I recommend you get one…or a set if possible! More on that later, but I use cast iron a great deal for many dishes and meals that I prepare.
Just before we start cooking, take a few minutes and go make 1-2 large cups of black coffee. No sugar, cream…no whip cream or caramel drizzle please…that cup of coffee comes later!!! Set the hot, black coffee aside and near the stove top.
Place an 8″ – 10″ cast iron skillet over medium high heat on your stove top. If you have a glass stove top, check manufacturer directions and possibly plan ahead and heat the iron skillet in the oven. Separate or slice the country ham into roughly biscuit size portions. As the skillet begins to heat, add a few pats of butter. After the skillet comes up to temperature, carefully place the ham slices into the hot skillet leaving enough space between them to easily turn the ham as it heats. The ham will sizzle and may smoke slightly. This is a great time to add any excess fat or trimmings you made earlier when preparing the slices. These trimmings will remain in the skillet for the duration of heating all the ham slices you prepare for breakfast. Depending on the thickness of the slices, it usually only takes 1-3 minutes for each side. When turning the slices, you should see where the sugars in the ham have caramelized and stuck to the skillet bottom. This is ok…in fact, it’s exactly what you want and essential to great red eye gravy that you will soon make in this same skillet. Be careful not to overcook the ham. It should still be pliable, tender and glisten rather than stiff or dry in appearance…unless, that’s how you like your ham…to each, his or her own!! You may need to replenish the butter along the way, depending on how many slices you prepare. After all of the slices have been heated and set aside on an open plate…no paper towels…turn the heat under the skillet to its highest setting. All the drippings, butter and caramelized sugars will soon begin to smoke. CAREFULLY…really carefully, pour a cup of the hot black coffee into the hot skillet. Expect, and protect yourself from the significant amount of steam that will rapidly rise from the skillet. With a sturdy spatula, gently begin to scrape any remaining trimmings or caramelized sugars from the bottom of the skillet, while also stirring the mixture. Add a generous amount of black pepper at this point. I like to add 1-2 tablespoons of sugar here, and if I have one, I’ve been known to add about half of a can of Coca-Cola at this point as well. Allow the mixture to continue to simmer rapidly for 3-4 minutes then reduce the heat to a low simmer. Take a metal dinner spoon and taste test the gravy when it cools enough to do so. The flavor should be a balanced…not too string from the coffee, not to sweet from the sugar or Coca-Cola…and you can adjust either way, using more sugar, coke or black coffee that was held in reserve. When the taste is where you want it, turn the heat off, and add the plate of ham slices and all the drippings that have gathered in the plate back into the skillet to finish off the flavor of the Red Eye Gravy and hold or return moisture to any slightly over cooked ham…and hold the heat until ready to serve.
For presentation, you can serve straight from the skillet, or pour up all of the ham and red eye into a large bowl. You can also separate and plate the ham separately from the gravy that you may place in an appropriate sized serving bowl. One thing to consider…it’s easy to not have enough Red Eye Gravy when you first learn how to prepare it…so as my Dad always used to say, if the Cook goes hungry, it’s their own fault!!!
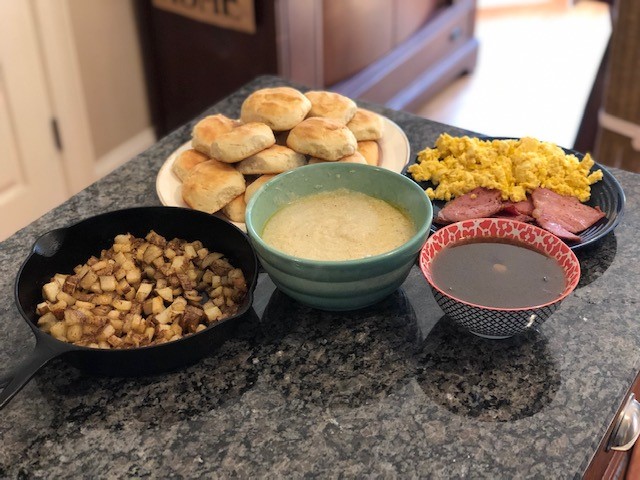
Another great use for the Red Eye Gravy in this meal, is to pour a spoon or two over the grits after they are plated!! There are plenty of directions out there for grits…including on the package! For now, I’ll just say if you’ve ever had great grits or bad grits, you knew it at first bite!! And in both cases, the result almost always has something to do with 3 ingredients…Butter, Salt…and cooking time!! Too little butter or cooking time…grits are NOT going to be great! Too little, or too much salt…grits are not going to be great!! At The Briggs House, we typically use real butter, and coarse salt. We also often use stone ground grits, but have found that the 5 minute grits work very well, IF…you cook them covered, on the stove top, and for at least 15 – 30 minutes…making sure to check that they have enough water or milk along the way. You can of course add cheese, cream cheese, cook the grits in chicken broth or use half and half, sour cream…the list is limitless and dependent on your tastes…and imagination!
I cant wait to hear how about your favorite breakfast!!!

